Reverse Tunneled Proxy with Pangolin
Pangolin is a self-hosted tunneled reverse proxy management server with identity and access management, designed to securely expose private resources through encrypted WireGuard tunnels running in user space. With Pangolin, you retain full control over your infrastructure while providing a user-friendly and feature-rich solution for managing proxies, authentication, and access, and simplifying complex network setups, all with a clean and simple dashboard web UI.
Table of Contents
Requirements
Setup will be using Docker, please look for alternative method in the official documentation. (This is just a log for my setup, and I’m pretty sure no one is reading this except me haha)
- VPS with public IP
- Local Server
- Domain
DNS Setup
Make sure to add this two record.
1yourdomain.com   A   Auto    YourPublicIP
2*.yourdomain.com   A   Auto    yourPublicIP
VPS Setup
Before the installation, make sure no application is using port 80 and 443. You can check using `netstat -tulpn'.
1root@engago:~# netstat -tulpn | grep 443
2tcp        0      0 0.0.0.0:443             0.0.0.0:*               LISTEN      3314824/docker-prox
3tcp6       0      0 :::443                  :::*                    LISTEN      3314829/docker-prox
4root@engago:~# netstat -tulpn | grep 80
5tcp        0      0 0.0.0.0:993             0.0.0.0:*               LISTEN      3314780/docker-prox
6tcp        0      0 0.0.0.0:80              0.0.0.0:*               LISTEN      3314803/docker-prox
7tcp6       0      0 :::80                   :::*                    LISTEN      331480
Download the installer.
1curl -fsSL https://static.pangolin.net/get-installer.sh | bash
Execute the installer with root privileges:
1sudo ./installer
 1Welcome to the Pangolin installer!
 2This installer will help you set up Pangolin on your server.
 3
 4Please make sure you have the following prerequisites:
 5- Open TCP ports 80 and 443 and UDP ports 51820 and 21820 on your VPS and firewall.
 6
 7Lets get started!
 8
 9=== Basic Configuration ===
10Do you want to install the Enterprise version of Pangolin? The EE is free for personal use or for businesses making less than 100k USD annually. (yes/no): no
11Enter your base domain (no subdomain e.g. example.com): yourdomain.com
12Enter the domain for the Pangolin dashboard (default: pangolin.yourdomain.com):
13Enter email for Let's Encrypt certificates: youremail.com
14Do you want to use Gerbil to allow tunneled connections (yes/no) (default: yes): yes
15
16=== Email Configuration ===
17Enable email functionality (SMTP) (yes/no) (default: no): no
18
19=== Advanced Configuration ===
20Is your server IPv6 capable? (yes/no) (default: yes): no
21Do you want to download the MaxMind GeoLite2 database for geoblocking functionality? (yes/no) (default: yes): yes
22
23=== Generating Configuration Files ===
24
25Configuration files created successfully!
26
27=== Downloading MaxMind Database ===
28Downloading MaxMind GeoLite2 Country database...
29  % Total    % Received % Xferd  Average Speed   Time    Time     Time  Current
30                                 Dload  Upload   Total   Spent    Left  Speed
31  0     0    0     0    0     0      0      0 --:--:-- --:--:-- --:--:--     0
32100 4797k  100 4797k    0     0  3140k      0  0:00:01  0:00:01 --:--:-- 3140k
33tar: GeoLite2-Country_20260116/GeoLite2-Country.mmdb: Cannot change ownership to uid 0, gid 0: Operation not permitted
34tar: GeoLite2-Country_20260116/COPYRIGHT.txt: Cannot change ownership to uid 0, gid 0: Operation not permitted
35tar: GeoLite2-Country_20260116/LICENSE.txt: Cannot change ownership to uid 0, gid 0: Operation not permitted
36tar: GeoLite2-Country_20260116: Cannot change ownership to uid 0, gid 0: Operation not permitted
37tar: Exiting with failure status due to previous errors
38Error downloading MaxMind database: failed to extract GeoLite2 database: exit status 2
39You can download it manually later if needed.
40
41=== Starting installation ===
42Would you like to install and start the containers? (yes/no) (default: yes): yes
43Would you like to run Pangolin as Docker or Podman containers? (default: docker):
44Would you like to configure ports >= 80 as unprivileged ports? This enables docker containers to listen on low-range ports.
45Pangolin will experience startup issues if this is not configured, because it needs to listen on port 80/443 by default.
46The installer is about to execute "echo 'net.ipv4.ip_unprivileged_port_start=80' >> /etc/sysctl.conf && sysctl -p". Approve? (yes/no) (default: yes): yes
47net.ipv4.ip_unprivileged_port_start = 80
This will create three docker container.
1docker ps
2
3CONTAINER ID   IMAGE                                          COMMAND                  CREATED        STATUS                PORTS
4
55a7d2951ae5c   traefik:v3.6                                   "/entrypoint.sh --co…"   6 days ago     Up 2 days                                                                                                                                                                                                                       traefik
623b823c4971c   fosrl/gerbil:1.3.0                             "/entrypoint.sh --re…"   6 days ago     Up 2 days             0.0.0.0:80->80/tcp, [::]:80->80/tcp, 0.0.0.0:21820->21820/udp, [::]:21820->21820/udp, 0.0.0.0:443->443/tcp, [::]:443->443/tcp, 0.0.0.0:51820->51820/udp, [::]:51820->51820/udp                            gerbil
718d7560ce63e   fosrl/pangolin:ee-1.14.1                       "docker-entrypoint.s…"   6 days ago     Up 2 days (healthy)                                                                                                                                                                                                             pangolin
87ead48db901e   ghcr.io/mcbtaguiad/sipup-luna-web:main         "/bin/ash /docker-en…"   6 days ago     Up 2 days (healthy)   8000/tcp
Wait for the container to fully initialized and then visit the subdomain of pangolin container, in our case we set to default pangolin.yourdomain.com. Go with the account creation and you are set. Will discuss later how to add site and resources that will be tunneled.
Local Server Setup
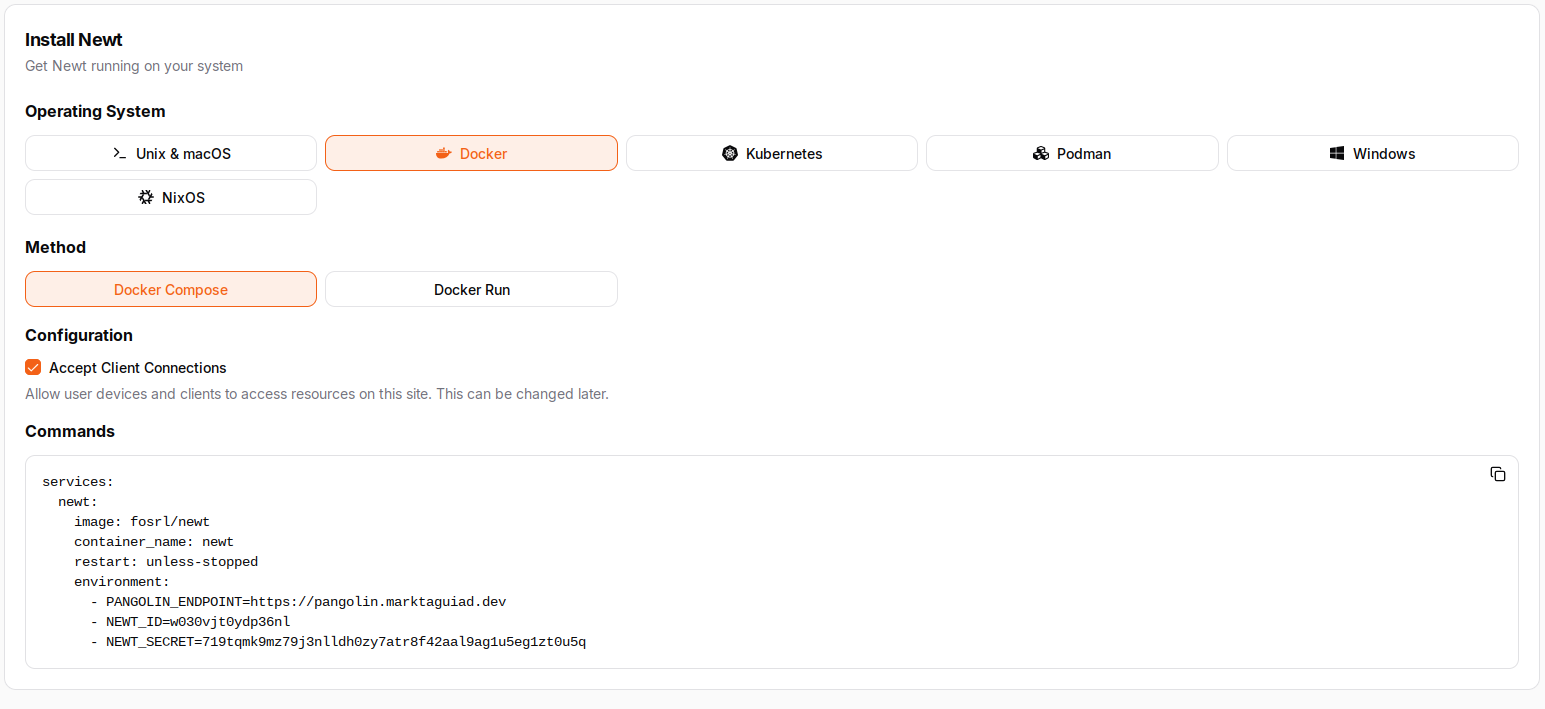
Now we need to add this server to using pangoling client Newt. Navigate to your pangolin dashboard and go to site, then click add site - add name for this site. For this example we will be using docker, on the Operating System option - click on Docker. Copy the content for the compose.yml, as we will be modifying it for it to work on docker network (using docker dns) and not needing to expose is using ip and port. With this method, we can set application to be not exposed outside and it will just be directly tunneled to the pangolin proxy.
Create a docker network.
1docker network create pangolin-proxy
Now create the compose file for Newt container, add docker network.
compose.yml
 1services:
 2  newt:
 3    image: fosrl/newt
 4    container_name: newt
 5    restart: unless-stopped
 6    environment:
 7      - PANGOLIN_ENDPOINT=https://pangolin.yourdomain.com
 8      - NEWT_ID=w030vjt04d336nl
 9      - NEWT_SECRET=719t1lksdk9ma7j3nlldh0zy7atr8f42aal9ag1u5eg1zt0u5q
10    networks:
11      - pangolin-proxy
12networks:
13  pangolin-proxy:
14    name: pangolin-proxy
15    external: true
Run the container. Now everytime you are running an application that you want to expose or tunnel to the pangolin proxy, make sure to add the network section. Check the example applicatin below.
 1services:
 2  jellyfin:
 3    image: jellyfin/jellyfin
 4    container_name: jellyfin
 5    ports:
 6      - 8096:8096/tcp
 7      - 7359:7359/udp
 8    volumes:
 9      - /config:/config
10      - type: bind
11        source:/media
12        target: /media
13    restart: unless-stopped
14    networks:
15      - pangolin
16networks:
17  pangolin:
18    name: pangolin
19    external: true
We mention that we will not be using the IP and Port when we are gonna tunnel the application, we can utilized the built-in DNS of docker. Like in kubernetes using services, in here the DNS record for the application will be the container_name we set. To check use docker ps.
1CONTAINER ID   IMAGE                                                            COMMAND                  CREATED        STATUS                  PORTS
2d815bd083d62   jellyfin/jellyfin                                                "/jellyfin/jellyfin"     30 hours ago   Up 30 hours (healthy)   0.0.0.0:7359->7359/udp, [::]:7359->7359/udp, 0.0.0.0:8096->8096/tcp, [::]:8096->8096/tcp   jellyfin
Adding Resources
Now for the exciting part (kidding). Navigate to resources and click on public then add resources. Set the subdomain you preffer and set the target to the Site added earlier. Like we discussed earlier, in our example it can be set to IP or just the DNS (jellyfin) and port is 8096. Create resources, additional config would be if you want your application to have extra layer of security, Pangolin has a feature to use SSO (login first) to secure the web application. This can be configured in the resources section.
